SMSGate was an Embeto Electronics project at which I started working a long time ago, in 2017 while I was an intern at Amiq Consulting where I also wrote an article on their blog about this topic. The final versions of this project were completed only one year later, at the date of this current post. SMSGate was also my Bachelor’s Thesis subject. This project’s git repository is publicly available here and also the Fusion 360 3D enclosure design can be explored in the browser or downloaded here.
SMSGate is a bridge between a LAN and GSM network that can be used by system administrators to monitor and control one or more computers on the LAN. Thanks to its GSM and GPRS external communication channels, this device is able to send and receive notifications via email or SMS also during unlikely but possible events such as power losses or Internet connection loss.
SMSGate was one of the most holistic and inclusive projects at which I had worked in the years when I was fully dedicated to Embeto Electronics. It included a GSM module from a 3rd party vendor, a Raspberry Pi 3 running a Python application, a Li-Ion battery, and a custom made circuit board. My contribution was present in any aspect of this project, from circuit board design to product design and assembly.
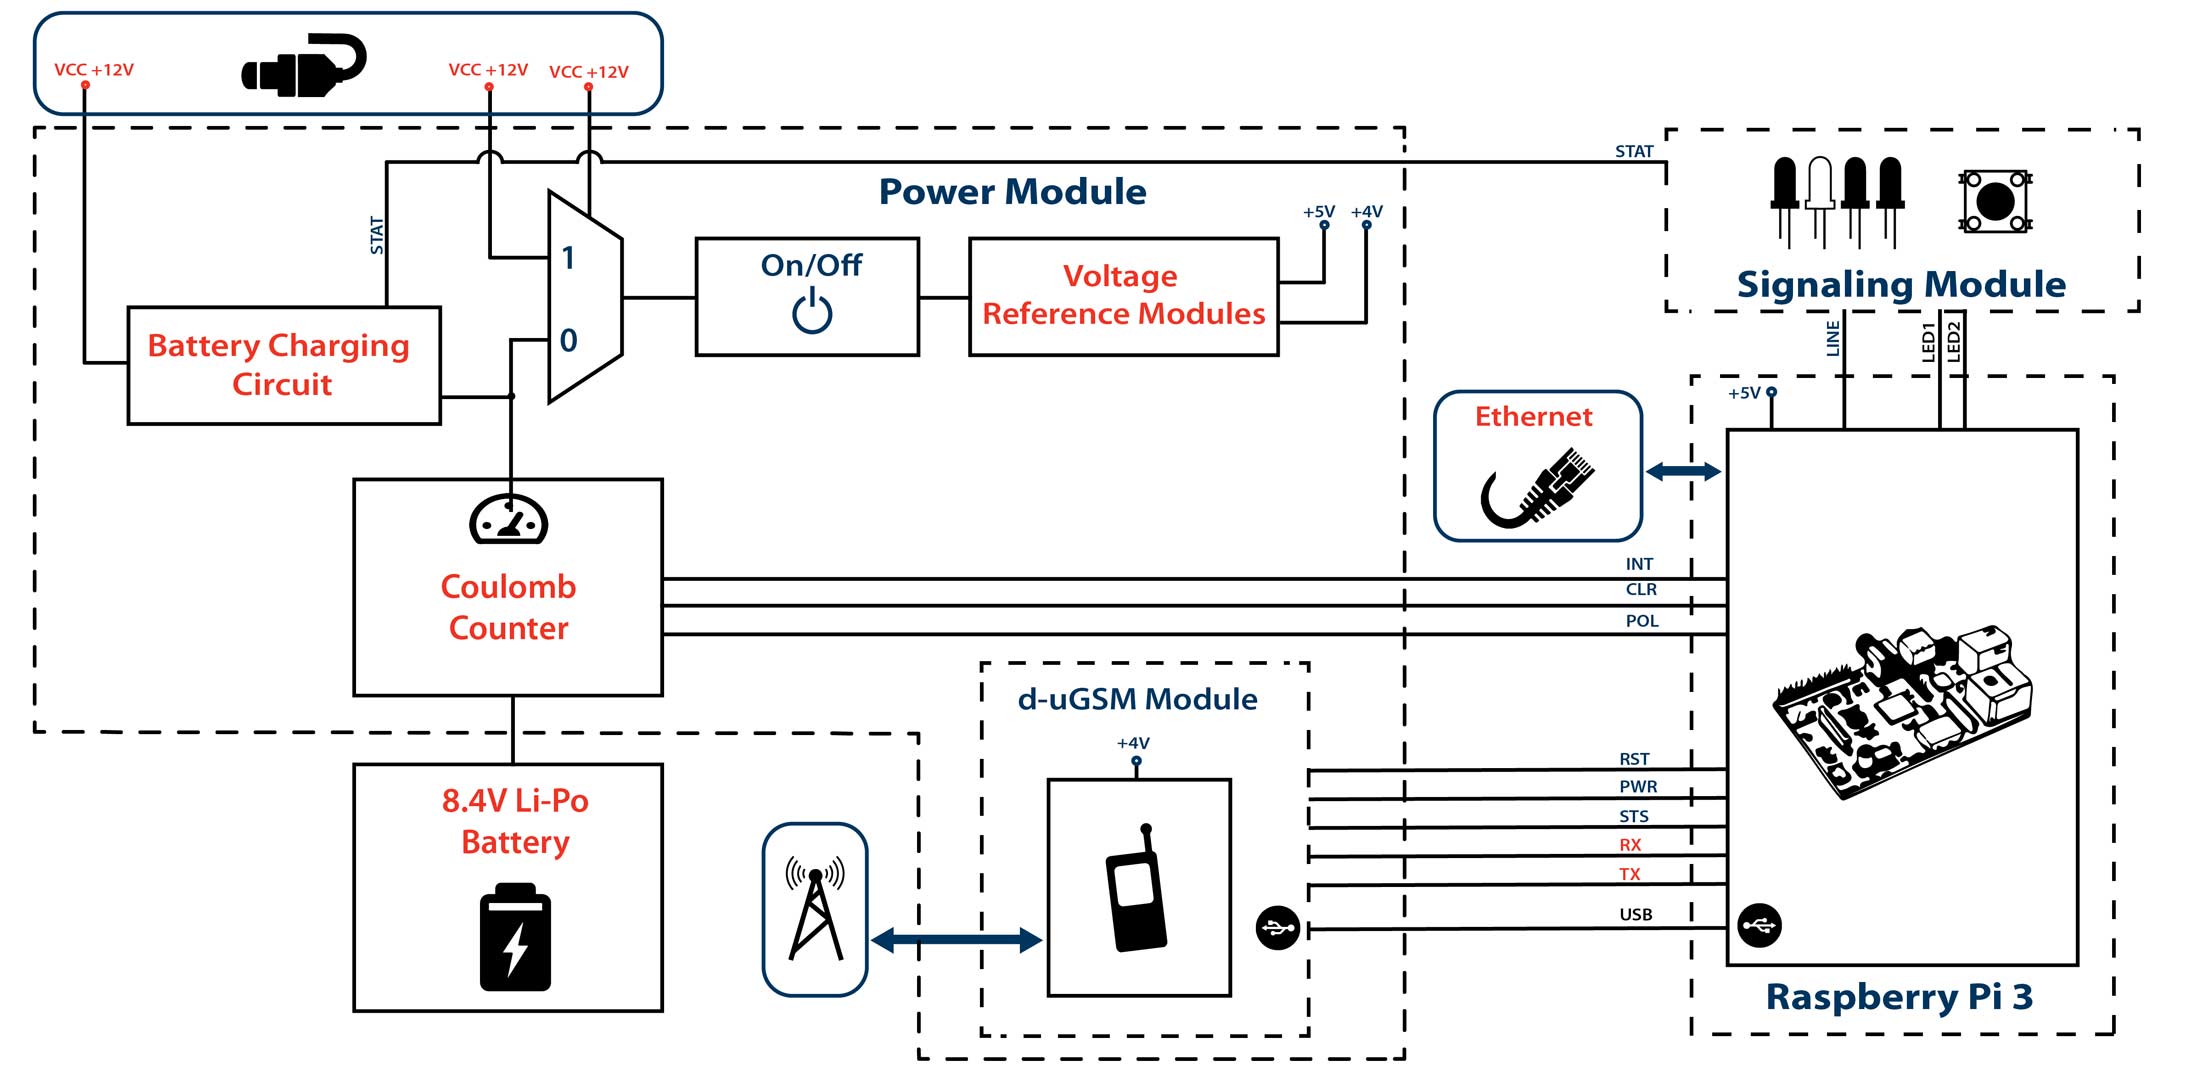
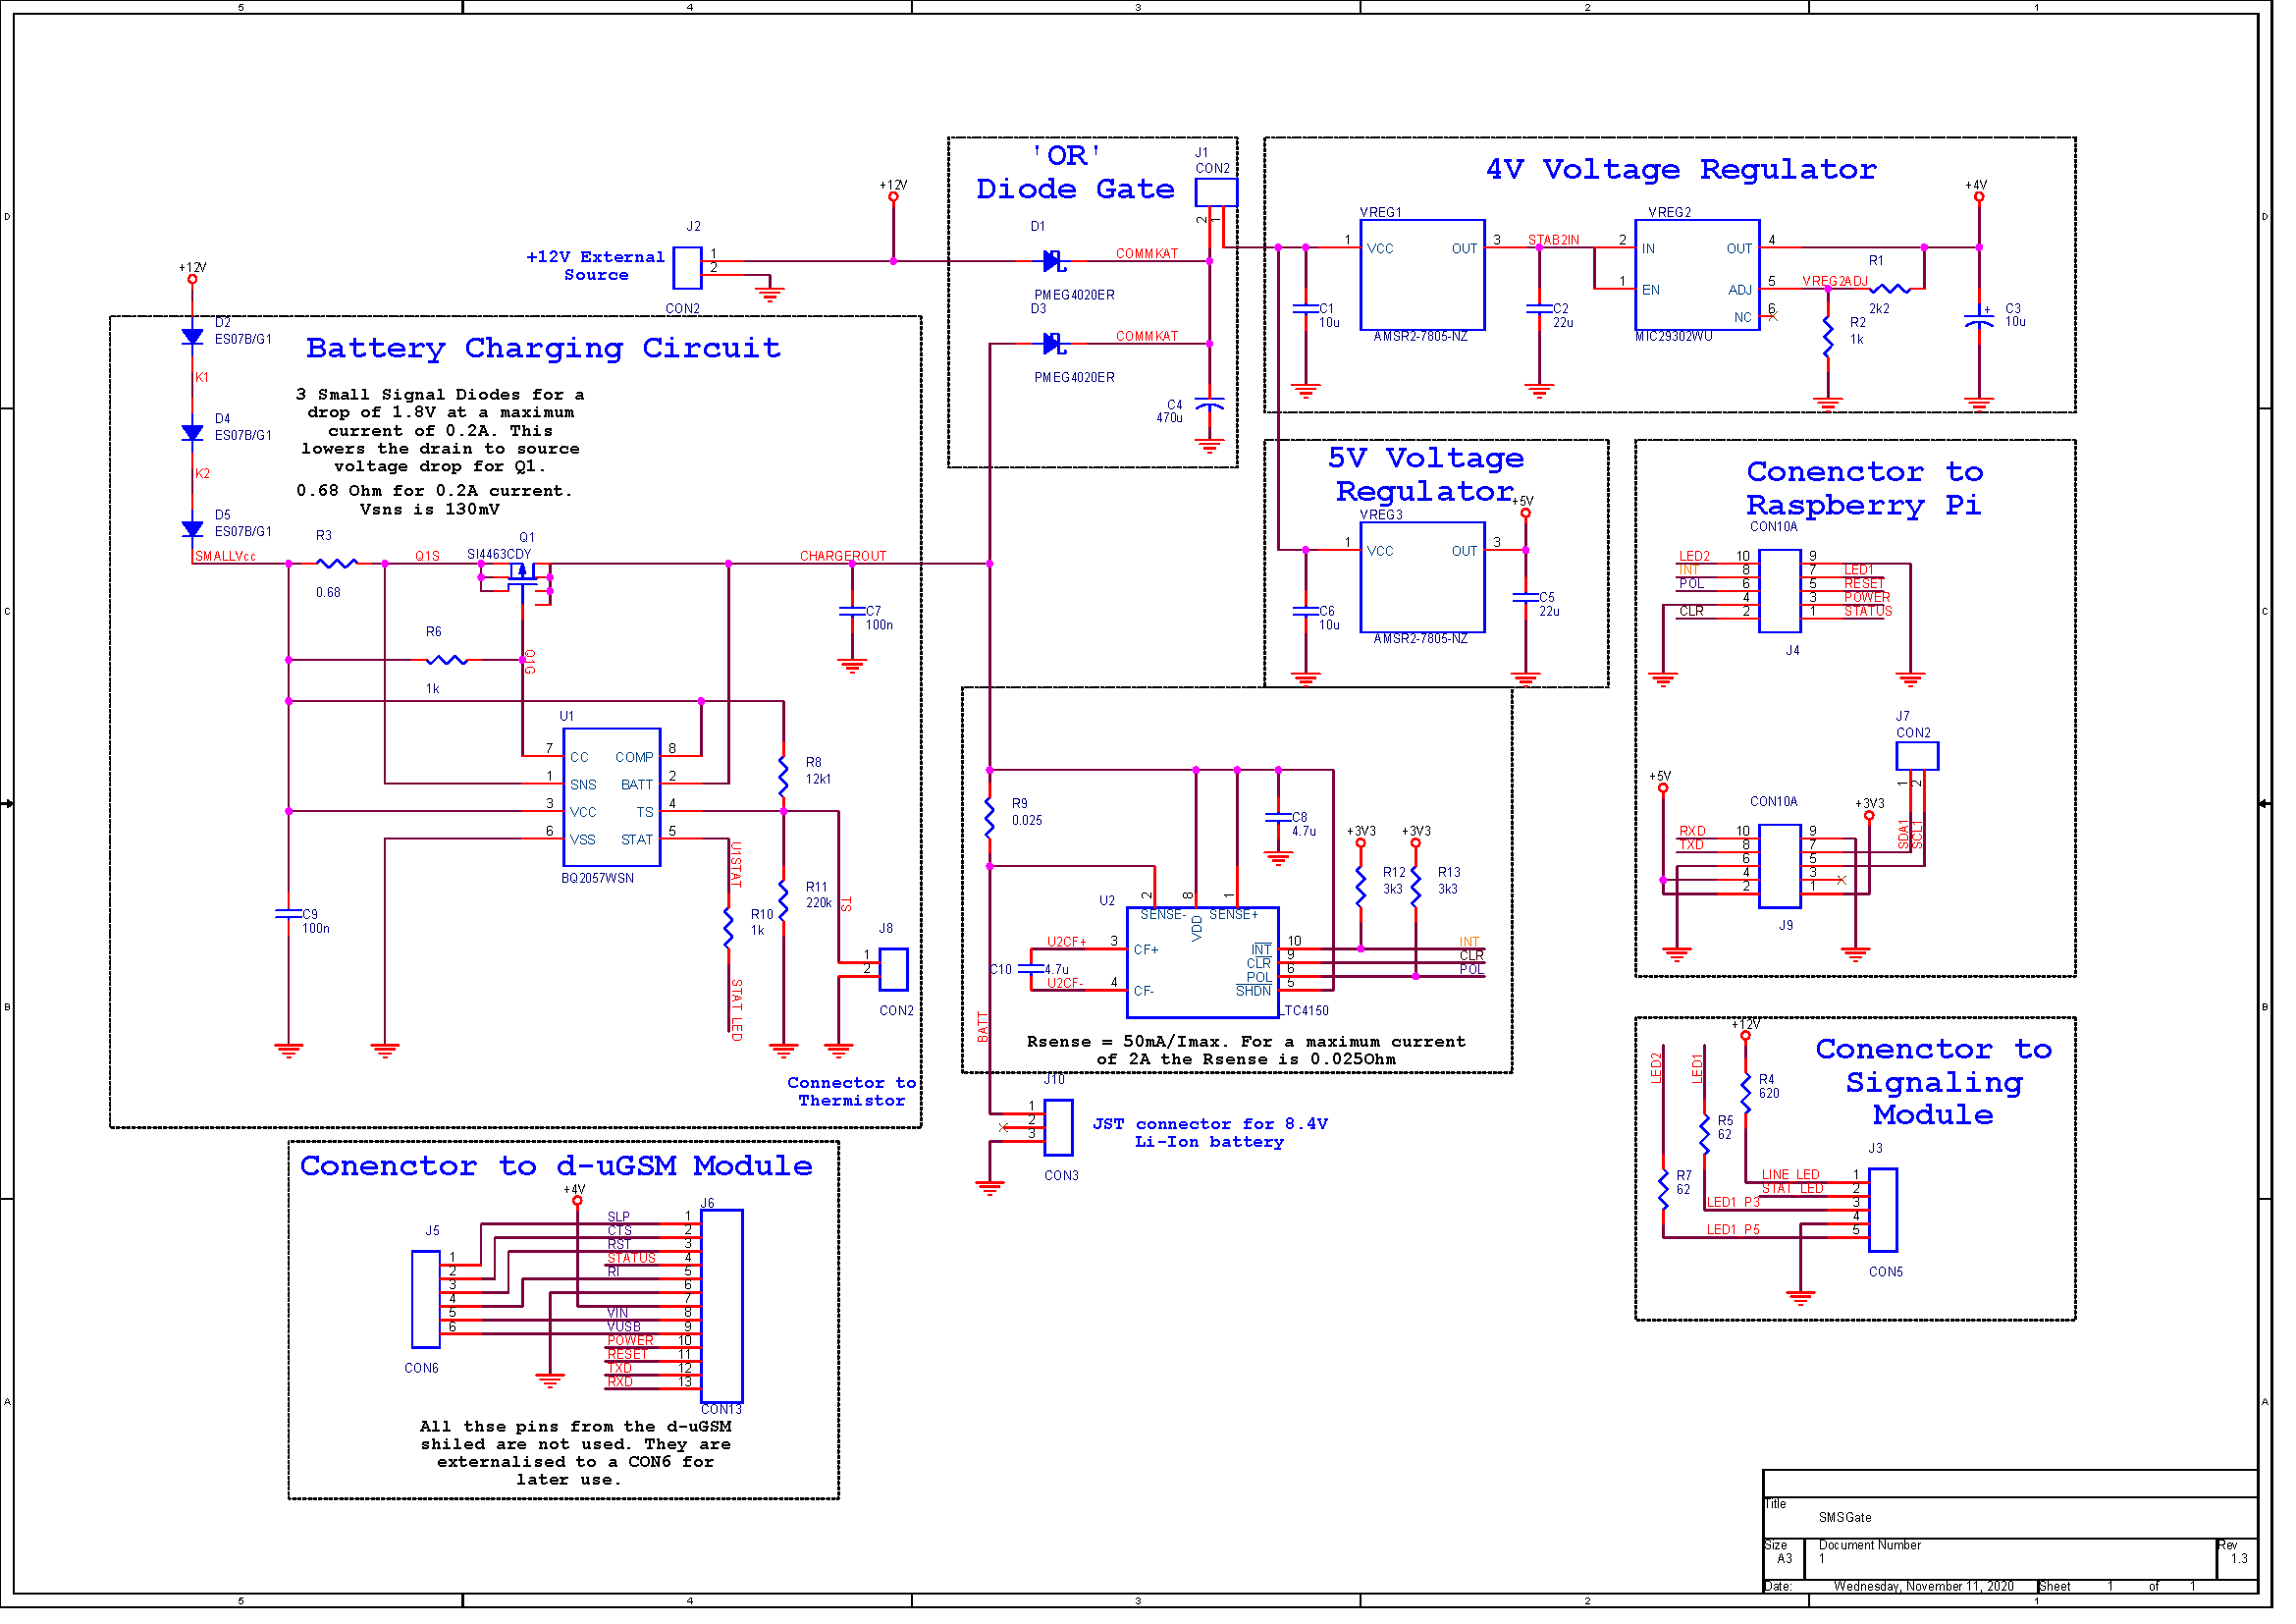
Figure 1 displays an electrical block schematic for the SMSGate system. The custom-made circuit board whose schematic is also displayed in Figure 2 included a Coulomb Counter circuit, battery charging circuit, VRMs, GSM module, and an “OR” gate with diodes. The latter element switches the system’s power source between the internal battery and the external charger, when present. The Voltage Reference Modules (VRMs) stabilize the +4V and +5V voltages with high-efficiency DC-DC converters. The battery charging circuit is based on a BQ2057 IC with an external series MOS transistor. The Coulomb Counter based on a LT4150 IC counts the current passing via a sense resistors to and from the battery.
I used the same techniques of laser cutting and assembling which I came to master through older projects such as Dexter v1, Dexter v2, or soundwaze. During the total time of development of this project, I designed two different enclosure solutions, the second being presented in Figures 3 and 4. Learning the basics of 3D CAD Design in Autodesk Fusion 360 empowered me with the necessary skills to quickly sketch a new design from scratch when needed.
As previously presented, I fabricated the enclosure from perspex laser cut using the tools from Modulab. In Figure 9 you can see the cutting process followed by the gluing stage from Figure 10 (acrylic acid glue was used). Once the structure was solidified, I started the smoothening of surfaces with sandpaper of different granulations. I also filled the small gaps with body filler and sandpapered it once again. In Figures 11 and 12 you can see the case before and after the painting process.
In Figures 13 and 14 is displayed the 1st version of the enclosure, initially fabricated at the beginning of this project back in 2017. The reason for designing the 2nd version of the enclosure from Figures 15 to 17 was that I replaced the battery with a smaller size one which had the same electrical capacity.
Looking back I can now say that SMSGate was the most challenging and demanding project I had been involved in. It included knowledge from different fields, some I had at that time and some I was forced to gain. Since ‘learning-by-doing’ is how I learn the best, I can certainly say SMSGate was also the project from which I learned the most.


